
As promised, my next project after The Big Gray Sweater was a "girlie" one--a spring top for my daughter. (If I knit spring clothing, spring will come sooner, right?) It's from a Sublime pattern called Frangipani {Ravelry link}, but I call my version "Cream Puff" because of the yarn color I chose and the modified sleeves, which are slightly puffed. (See this blog post for details on the sleeve construction.)
Over the years, I've received lots of comments on the quality of my finished knitted items. As I have mentioned here before, I am constantly striving to perfect my finishing techniques. I think there is a difference between something looking "homemade" and something looking "handmade" or "hand crafted", and I do my best to achieve the latter.
Sometimes, though, people get the wrong idea. Once, a friend who hadn't been knitting for very long told me that seeing my finished items made her feel like a complete failure. After talking to her about it, I discovered that she assumed my projects looked like that as I was knitting them! (Oh, if only that could be true!) In actual fact, nothing comes off my knitting needles looking perfect. Finishing takes work, and is really a craft in and of itself.
Just to give you a basic idea of the process, I've decided to swallow my pride and show some photos of this Cream Puff Sweater before it was finished. The image below shows the two front pieces before they were joined to the back:
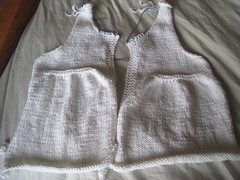
Notice the curling edges, the bumpy, uneven stitches, and the yarn ends hanging out. It's always tempting at this point to despair. I mean, who would want to wear a sweater that looks like that? And, honestly, even though I have experienced this stage over and over again and know it is not how the finished item will look, I still feel a little niggling doubt when I see this. Here's a photo further on in the process, when the sleeves were completed, the back and fronts sewn together, and the collar knitted on:
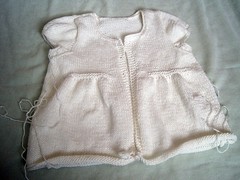
Better, yes, but still curling, still bumpy, still sporting stray yarn ends. Even after weaving those in, the sweater will look awful. Do I throw up my hands in despair? No! I take a deep breath and move forward with faith! Time to wash and block:
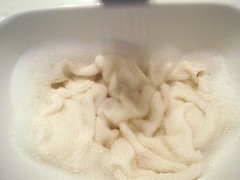
Here is the sweater in the sink, swimming in a bath of mild soap and cool water.
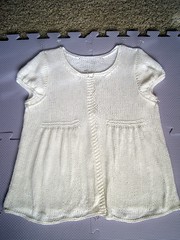
And here it is all pinned out on my blocking tiles to dry into a more presentable state! Getting it wet causes the yarn to relax, and stretching it out to pin it smooths out the uneven stitches. When it's dry (this cotton blend took forever to dry, by the way), I just needed to sew on some buttons:
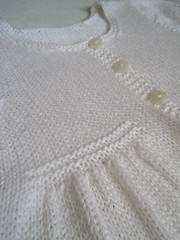
Then it was ready for K to wear! I am very happy with how it turned out, but--more importantly--she loves it! Definitely a successful project.
No comments:
Post a Comment